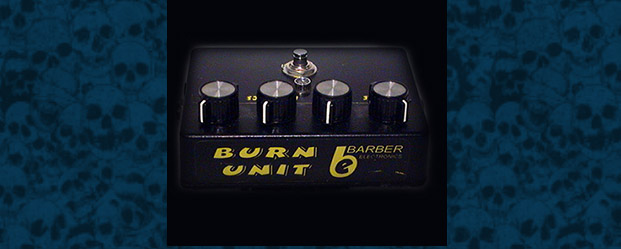
Original 4 Knob Barber Burn Unit Overdrive
Barber Burn Unit
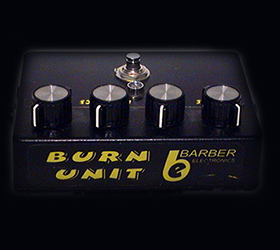 Even though I am a creature of habit and hate change of any kind, the quest for gear will always win out. If you read my “Open Road” article a couple of posts back, you probably didn’t expect a new overdrive to enter into my set up I’m sure. But in fact that is what happened. Two pedals to be exact. And both of them are keepers for sure. On a whim I picked up an original 4 knob Barber Burn Unit. And let me tell you , It was a great find. The job of “main overdrive” is now split between the Barber and the Open Road. But the barber does something that the Open Road didn’t do very well: it blends with other overdrives to allow me a wicked range of tones. So the Open Road is used as stand alone, and the barber I can use alone or with other pedals.
The Barber utilizes 4 knobs (volume, tone. dynamics, and burn) And can be dialed in to give you a huge tonal palette, as long as what you’re after is NOT metal. It doesn’t go there nor was it designed to. It’s an overdrive of the highest order, NOT a distortion pedal. However, if you drop another drive pedal in front of it you CAN reach metal territory no problem, as happens with a Modtone Dyna Drive. But I don’t play metal so it’s a moot point anyway.
The volume and tone are pretty straight forward. It has gobs of volume on tap and I doubt I will ever have a need to dime that knob. The tone knob is actually useable on this unit too. The Dynamics knob reacts like a depth knob IMHO and is usable through the entire range. Then there is the “Burn” knob (which is a pretty accurate description). I guess it’s the “gain” knob but it does a lot more especially when you get the right balance in conjunction with the Dynamics knob. This is when the pedal really comes to life. The more you crank it, the sweeter and more defined the tone becomes. There is also an internal trim pot that I have no idea what it does and now I’m afraid to tweak it because it sounds so good as it is, and I don’t want to screw it up.
Construction is typical Barber. Rock solid. You could drive a truck over it and it wouldn’t miss a lick. (It’s like that old joke: If we have a thermonuclear war the only things left will be cock roaches, and Keith Richards. Well, you can add Barber stomp boxes to that list.)
It’s honestly like no other overdrive I’ve ever used. I tried at various locations in front of and behind a Modtone Dyna Drive, Visual Sound Open Road, and my Akai Blues Overdrive (see previous article). The Barber likes to be first in line for sure and it seems to play well with these pedals at least, especially the Akai (go figure) which leads me to conclude that it will play nice with virtually anything. As I said before, this is now my main Overdrive with the Akai right behind it, and it gives me everything I need, and unless I stumble across something really rare or just flat out too cool to pass up, it will be from now on. (I could probably let the Open Road go, but I still love that box too. Besides, no one can make me give it up so I think I’ll just keep it).
(note: I keep putting off buying another SM-57 since my other one walked on me so I can’t mic the cab and record some decent audio clips. But I’m looking now and when I get one I’ll post clips)

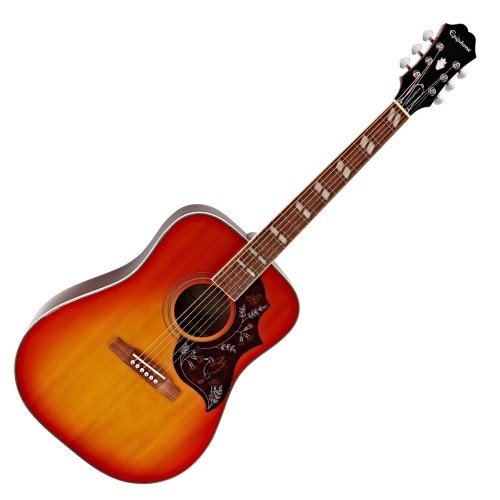
Iconic Hummingbird Acoustic on a Budget
Epiphone Hummingbird $299 street
 Over the years I’ve had a number of acoustics. Some good and some not so good (I’m sure most of you have too). But at some point I get that G.A.S. syndrome and usually sell what I have and shop for another one. This last time (due to pay cuts at work) I sold my acoustic because I needed rent money. I had an older Epiphone Hummingbird that was really nice and I got it for cheap from craigslist. But due to the aforementioned pay cuts I couldn’t afford a replacement. Time passed and things have started to look up again somewhat and I decided it’s time to pull the trigger on another acoustic.
My intention was to look for another Hummingbird, but I also wanted to see what else was available in the off-chance I may find something I like better. In a months time I tried lots of low priced designs and they all seem to feel kinda cheap. Not that they were bad players, in fact some were quite good. But there’s something missing from the overall feel of most of the models I tried. Plus none had the tone to compete with the Hummngbird and of course fit and finish is also iffy on a budget acoustic. Having exhausted every good lead on craigslist I finally said ‘screw it” and went to some local music stores to try out the new stuff.
I went through everything and was largely unimpressed with 2 exceptions: as expected the Epiphone Hummingbird Pro and the Dove Pro. I don’t know how long these “pro” models have been out so they’re new to me. Having played the Epi Hummingbird for quite awhile I noticed the difference in quality right off.
First, it’s electric and that’s a welcome addition. It uses an onboard E Performer system which sounds better than average to my ears. But the real clincher is that these seem to have been built to tighter tolerances, although I may have just gotten lucky. But I’ve seen 2 others since I got mine 3 weeks ago and they too had the noticeably better fit and finish.
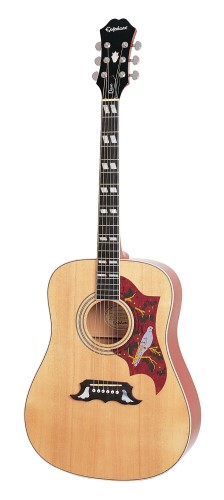 Which brings us to the bottom line: what does it sound like. That’s an easy answer, it sounds like a Hummingbird. After my previous Bird I have to agree that the design, construction, and combination of materials is like no other guitar, hence the unique sound. And that’s what I missed after selling my previous one. I had to have that sound again. The most beautiful acoustic ever! And it doesn’t matter if you have a Epi or the Gibson model because they sound so similar. Not identical by any stretch of the imagination, but still there is something familiar about them that’s buried in the tone. I’ve heard people say that they can’t tell the difference in playability but I don’t buy it. I can tell the difference for sure, but that doesn’t mean the Epi is bad, it’s just different, that’s all. For me the cost differential is enough to make the Epiphone worth taking for a test drive. It has the ringing tonal quality that lies within a range that makes it easy to vocalize with but can stand on it’s own without it.
Everyone that hears it comments on the beautiful tone as well as the finish. They have taken a lighter approach to the cherry sunburst by not making it quite so red. It looks awesome. All the other factors are there: a relatively fast, easy playing neck with smooth well fitted frets, the classic Hummingbird pick guard, the split parallelogram position markers, and full binding on the body and neck. They’ve also added genuine Grover tuning machines as standard equipment. The suggested retail is almost 500, but at street you can snag one like I did for $299. It’s a great deal on a great guitar. If you have the extra 2000 to 3000 for the Gibson you could go that route. Hell, to be honest, if I had the bucks to drop on a Gibby I probably would have. And I may still someday. But until that big winning lottery ticket drops in my lap I’ll just enjoy this one because it is, after all, a Hummingbird.
The Preamp Tube Maze
Preamp Tube Maze of Confusion
Preamp tube (12AX7) selection is a subject that will return as many opinions as there are guitar players. It’s the preamp tube maze of information and opinion (or should I say MIS-information) If you research any “preamp tube” (or any other vacuum tube or “valve” for that matter) on the net like I did, your head will be filled with so much conflicting information it just might explode! The thing is, it’s not exactly wrong information, it’s just that the sound generated by tubes is subjective. What sounds good to me might sound like fingernails on a black board to you. That’s a bit of an exaggeration to illustrate my point, but even slight variations in construction or materials will change the tubes character which can, and often will, make or break a valve.
To begin, the first change I made was to dump the cheap power tubes and plug in a matched set of new Mullard EL84s which have always been my favorite. I then re-biased the amp. Then I began my journey through the preamp tube maze.
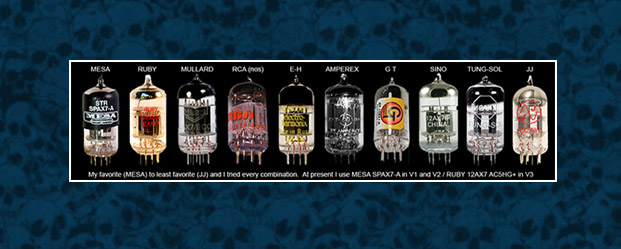
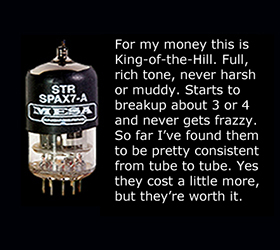
Alot of cats really like the JJ brand. In fact that was the first swap I did to my Jet City JCA20H. I hated them and could not get them out of there fast enough. They were terrible. Flat in the mids and lows and spikey in the highs. Thus my trek began with determination to find the best sounding tubes possible. I ended up with just about every 12AX7 from every manufacturer as well as every 12AX7 variant (including the 7025) over the course of 4 months. I tried matched sets as well as random combinations in order to find what I was looking for. There were several that I liked but only one combination nailed the tone I was chasing: V1=MESA SPAX7-A / V2=MESA SPAX7-A / V3 (or PI)=RUBY 12AX7AC5HG+ (note: the MESA will cost a little more but it’s money well spent in my opinion) And believe me, I spent some money here folks, but in the end it was all worth it. All of the other tubes I found to be either too harsh or muddy or flat sounding so I gave them away to some cats I met over at the Jet City Facebook page who needed replacements but couldn’t go the bucks for a new set at the time. Some of them are still in use because they like them, which only goes to show what we all knew anyway, that tone is totally subjective. In fact I didn’t write this post to push my opinions about tone on anybody. Everyone has that tone in their head that they’re chasing, and what works for me may not work for anybody else. Of course you have to factor in the amp you’re using which creates a pretty big variable even between amps of the same make and model. I wrote this hopefully to entertain and maybe enlighten a little bit. It was a crazy 4 months slogging through the preamp tube maze, and my non-playing friends just didn’t understand and thought I was an idiot for spending so much money on these little glass gems (and they’ll never understand). Even with all the blown money and time spent trying to locate certain tubes and the anticipation when I’d score something different and race home to swap them out then cranking up the amp only to be disappointed with the results and the aggravation of it all, it was worth every bit of it the first time I cranked her up with the right tubes in place. Suddenly all of the negatives just faded into memory and I couldn’t stop grinning like and idiot. I still get that feeling every time I play. Since this adventure I’ve toyed around with various overdrive pedals (a subject for a future post) and vibe pedals, but I can play without any of that shit and just use the tone stack on the amp to get any tone I could ever need. After 30 years I finally found my holy grail. I hope in some way maybe this story will help you find yours too.

LVS-1 Internal AC to DC Variable Voltage Unit
LVS-1 12v Accessory Power Solution
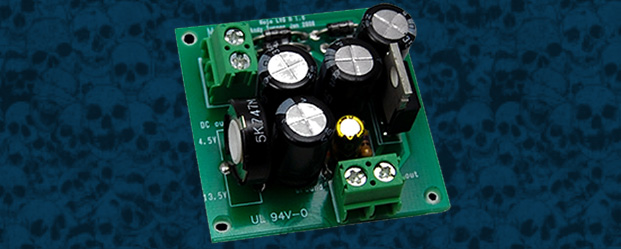
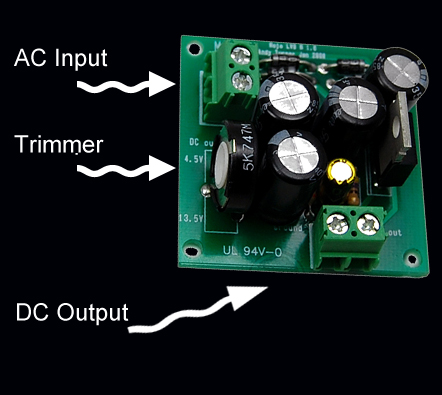
 A while back I posted an article on you how you could use a ac to dc 12v wall wart and mount it inside your amp to power LED accent lights without having an external power supply for them. Well it turns out there is a better way to accomplish this and I have the details for you. Floating around the net is a diagram for building a bridge rectifier to tap into the 6.3 volt AC heater supply so you could have usable 12v DC to power LEDs or whatever. But what I found is much easier. MOJO TONE has a little gizmo called the LVS-1. It’s a little 1.75″ x 1.75″ PCB that uses 6.3v AC input and it outputs DC voltage through a trimmer that will adjust from 4.5v to 13.5v. So no matter how you set up your LEDs you can supply the correct voltage.
Installation was super easy. Once you’ve removed the chassis and drained the caps (you know, so you don’t get fried by the high voltages found inside all tube amps) you just solder a wire to each 6.3v connection on the amps PCB (see picture).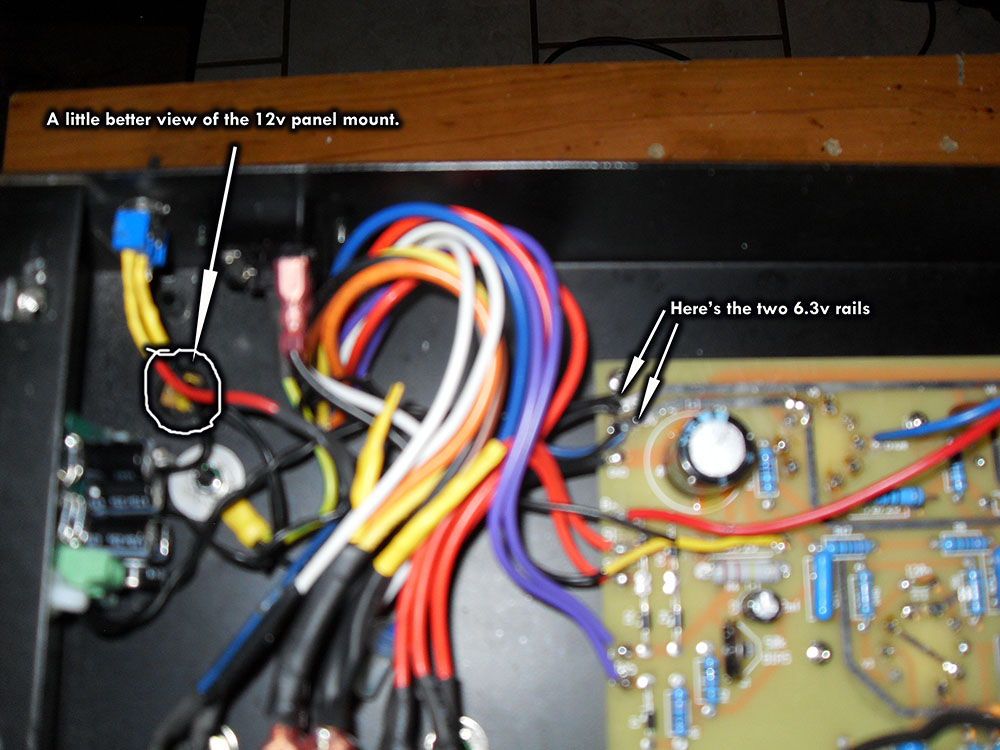
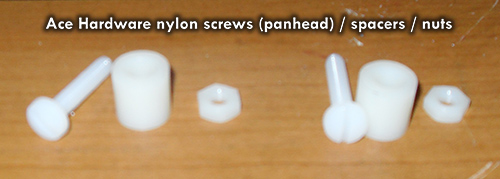
Connect them the the AC input on the LVS-1, then connect wires to the DC output connection and rout them through a micro on/off switch and a 12vDC panel mount jack. Drill a small hole in the back of the chassis for the switch and an appropriate size hole in the top of the chassis for the jack and mount them. To mount the LVS-1 to the chassis I used nylon panhead screws, nylon spacers, and nylon nuts. Clean.
For my LEDs I needed 12v. (here is where you really need to pay attention because you have to power up the amp and adjust the trimmer, so you’re gonna be in there with those lethal voltages. Keep one hand in your pocket). I used a 12v dc plug and left 4″ of wire 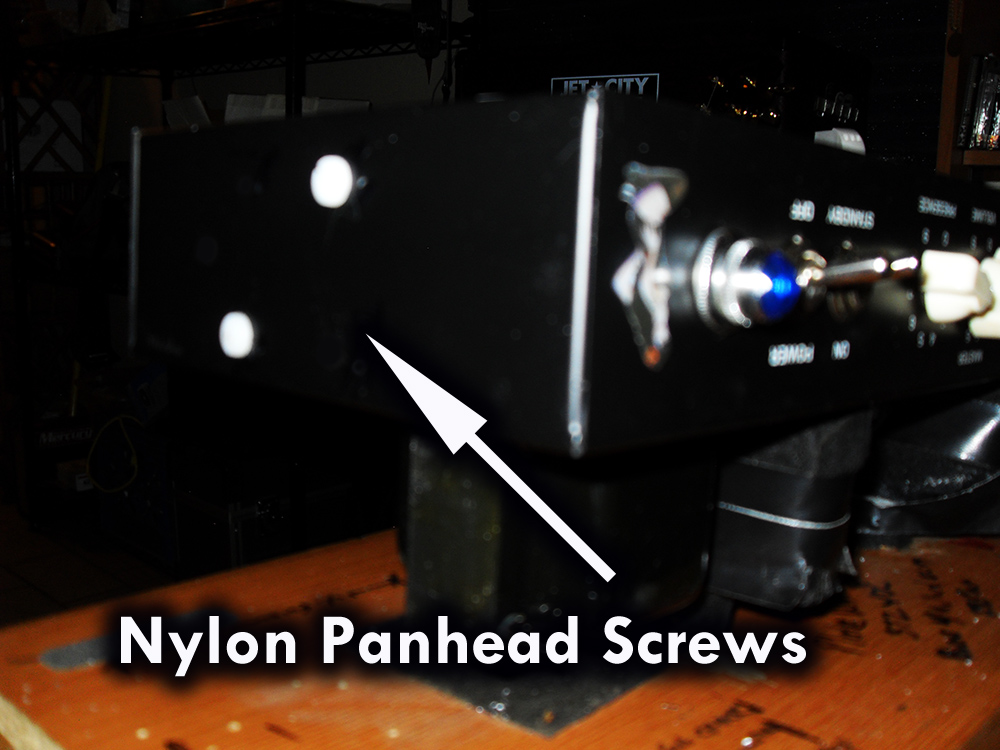 sticking out of it, stripped the tips and connected my volt meter via aligator clips to the wires , plugged it in to the jack and adjusted the trimmer to 12v. Afterwards I used the same plug and soldered the leads for the LEDs to it. Then I just mounted the LEDs in the top of the head and hot glued the wires around the inside to where the input jack is and once the chassis is back in and secured I plug the LEDs into the jack. Now when I need to remove the chassis for biasing or whatever i can unplug the LEDs and pull it out. THAT’S why used a panel mount jack. It’s a super clean installation and it works great.
Here’s what the MOJO TONE site says about it.
This low voltage power supply (comes assembled) makes it possible to run any 4.5v-13.5v circuit inside your tube amp powered from your 6.3v heater line. This unusual circuit does something previously not possible with standard circuits, it retains the heater center tap as the ground point for the DC output – meaning your switching circuits or low voltage effects can still be grounded to the chassis.
So there you have it. Tidy little installation that takes not much time at all and performs as advertised. Sweet!
Link: mojotoneLVS1
NOTE: Sorry about the fuzzy images. My digital camera is going south on me so as soon as I get a replacement I’ll replace these with some sharp, clear images.
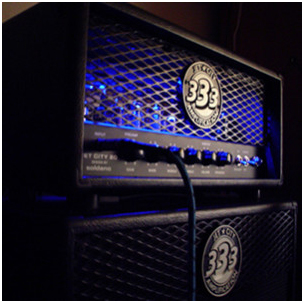
Blue LEDs installed

 Leslie West’s Favorite GuitarIn Featured, Guitars, VideosRead More […]
- A Video History of Dean GuitarsIn All Posts, Guitars, VideosEPISODE 1 EPISODE 2 Read More […]
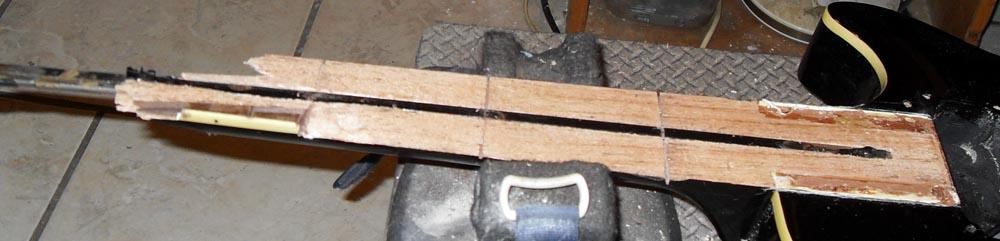 Set Neck ReplacementIn Guitars, RepairsA friend asked if I could repair a broken headstock on […]
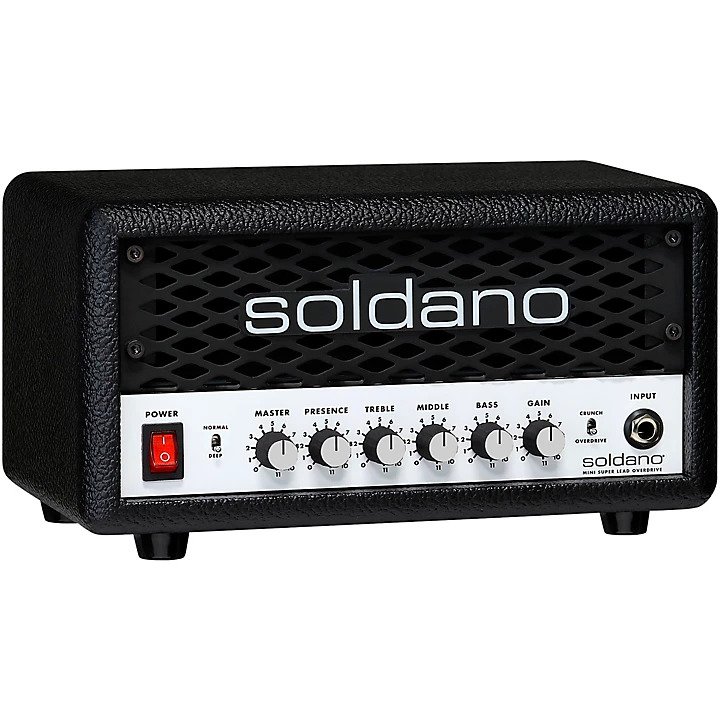 Soldano SLO Mini 30 Watt Killer AmpIn All Posts, Amps, ReviewsI have never gotten excited about ANY solid state amp. […]
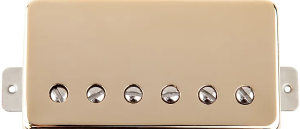 Leslie West Mountain of Tone PickupIn All Posts, Guitars, ReviewsWhen it comes to electric guitars, it’s common […]